
Have you ever looked at an old appliance, maybe a dryer that’s seen better days, and wondered if there was a way to give it a whole new purpose? Well, there is, and it’s a truly cool one! Making a fire pit from a dryer drum is that kind of project, a wonderful blend of clever recycling and creating something quite useful for your outdoor space. It’s a project that, you know, just feels right, especially if you enjoy spending time under the stars.
There’s a real charm to a DIY fire pit, particularly when it comes from something you might otherwise just toss out. Think about it: that old dryer, which once tumbled your clothes dry, can become the heart of many memorable evenings. It's an opportunity to create a cozy gathering spot, a place for stories and laughter, and even a spot for roasting marshmallows, too it's almost a perfect fit for that.
This idea, a dryer drum fire pit, really speaks to folks who like to get their hands busy and make things. It’s a project that shows off your resourcefulness, and honestly, it can save you some money compared to buying a brand-new fire pit. Plus, there’s a certain satisfaction that comes from transforming something old into something so wonderfully new and functional, isn't that a great feeling?
Table of Contents
- Why Choose a Dryer Drum for Your Fire Pit?
- Finding Your Perfect Drum: Sourcing Tips
- Getting the Drum Ready for Its New Life
- What You'll Need: Tools and Materials
- Step-by-Step: Building Your Dryer Drum Fire Pit
- Safety First: Important Considerations
- Making It Your Own: Personalizing Your Fire Pit
- Enjoying Your New Fire Pit: Best Practices
- Keeping It Going: Maintenance and Care
- The Bigger Picture: Repurposing and Our Planet
- Frequently Asked Questions About Dryer Drum Fire Pits
Why Choose a Dryer Drum for Your Fire Pit?
A dryer drum, as a matter of fact, has some really neat qualities that make it a surprisingly good choice for a fire pit. For one, the metal is often quite sturdy and can handle a lot of heat. It's built to spin and contain things, which translates well to holding a fire. Then there are all those holes, you know, the ones that let the air circulate to dry clothes? Those same holes are absolutely brilliant for providing natural ventilation for your fire, helping it burn brighter and with less smoke, which is pretty handy.
Cost is another big factor. Store-bought fire pits, honestly, can get quite expensive. But an old dryer drum? You can often get one for free, or for very little money, making this a very budget-friendly project. It’s also a way to keep something out of the landfill, giving it a second life instead of letting it become waste, which is something many people care about these days, too.
The size and shape of a dryer drum are also just about right for a backyard fire pit. It’s deep enough to contain the flames and embers, and wide enough to provide a good area for a decent fire. Plus, it’s relatively light, so you can move it around your yard if you need to, which is quite convenient for changing up your outdoor setup, or for putting it away for the season.
Finding Your Perfect Drum: Sourcing Tips
Finding the right dryer drum is, you know, the very first step in this fun project. You'll want one that's in good shape, meaning no major dents or rust holes, especially at the bottom. The inside should be fairly clean, without too much gunk built up from years of use. This part is pretty important for both safety and how well your fire pit will perform, as a matter of fact.
Getting Your Hands on an Old Dryer
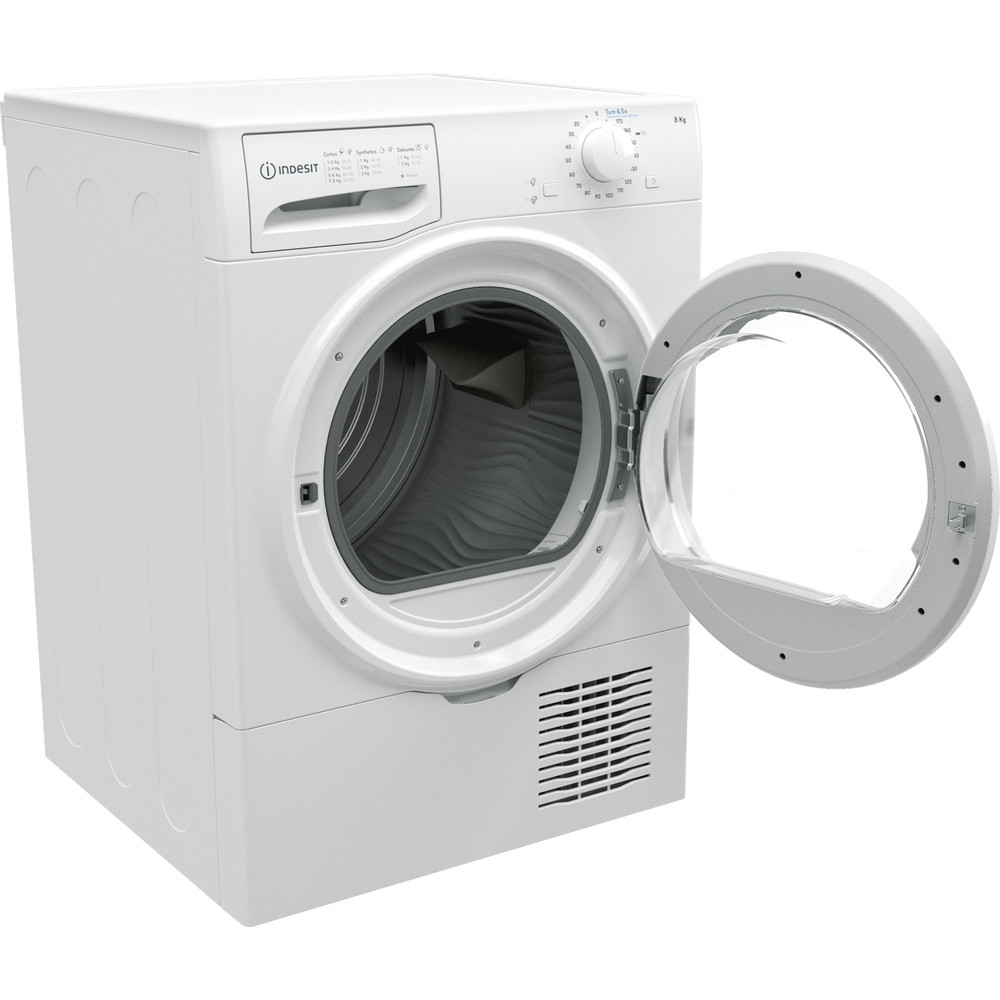
So, where do you find an old dryer that’s ready for a new life as a fire pit? One common place is from friends or neighbors who are upgrading their appliances. People are always, it seems, getting new ones. You know, they might be browsing an online aisle of dryers, or shopping at a big store like Home Depot for all their appliances and DIY needs, or even looking through a wide selection of dryers at amazon.com, where free shipping and free returns on Prime eligible items are a big draw.
Best Buy, for example, has dryers for sale from a variety of brands that you know and love, including Whirlpool dryers, Samsung dryers, LG, GE, Maytag, Amana, and more. People might be opting for professional dryer installation services when they get a new one, which means the old one needs to go somewhere. If you’re in need of a dryer, we’ve outlined the most important considerations to take into account, as well as the best models available today based on our expert knowledge and evaluation.
We evaluated each machine’s drying performance and recommend those that delivered consistently dry clothing, and we looked for navigable control panels, conveniently. Costco.com, too, has a huge selection of electric dryers, where you can browse electric dryers by brand, color, capacity, display type, and more to find the right dryer for you. Washers and dryers are some of the most essential appliances in your home, that's why it's so important to select the right washer and dryer for your needs. Start by assessing the area where you'll put it, but then consider what happens to the old one. This is where you can step in and offer to take it off their hands, which is pretty nice for everyone involved, basically.
You might also check local scrap metal yards, appliance repair shops, or even online classifieds. Sometimes, people are just looking to get rid of their old appliances, and they’ll be happy for you to take it away. Just be sure to ask if it’s an electric or gas dryer; the drum itself is what you want, and it's generally the same, but it's good to know what you're dealing with, you know?
Getting the Drum Ready for Its New Life
Once you have your dryer drum, the next big step is to prepare it. This involves getting rid of all the parts you don't need and giving the drum a good clean. It's not a terribly difficult process, but it does take a little bit of effort and attention to detail, which is actually quite important for a safe and effective fire pit, you know?
Cleaning and Disassembly Steps
First, you'll need to remove the drum from the rest of the dryer. This usually means taking off the top, front, and back panels of the dryer casing. You'll find the drum sitting inside, often held in place by a belt, some rollers, and a motor. Carefully disconnect the belt and lift the drum out. You might need a helper for this, as they can be a bit awkward to handle, you know, just because of their size.
Once the drum is out, you'll want to strip it down completely. This means removing any plastic parts, rubber seals, heating elements, wires, or anything else that isn't metal. These materials can release toxic fumes when burned, so getting rid of them is absolutely crucial for safety. Use a screwdriver, pliers, and maybe a wrench to take everything off. Be thorough, as a matter of fact, and look inside all the nooks and crannies.
After all the non-metal parts are gone, give the drum a really good scrub. Use soap and water to clean away any lint, dirt, or residue. You want the metal to be as clean as possible before you light a fire in it. Some folks even like to give it a quick once-over with a wire brush to remove any loose rust or stubborn grime. This step, you know, helps prepare the surface for heat and just makes it look better, too.
What You'll Need: Tools and Materials
Gathering all your supplies before you start is a pretty good idea, honestly. It makes the whole process go a lot smoother. You won't need a huge array of specialized tools, which is nice, but having the right basic equipment will definitely make the job easier and safer. Here's a quick rundown of what you'll probably want to have on hand, you know, just to be prepared.
- The Dryer Drum: Of course, this is your main piece, you know.
- Basic Hand Tools: Screwdrivers (Phillips and flathead), pliers, a wrench set, maybe a socket set. These are for taking apart the dryer, basically.
- Safety Gear: Work gloves, safety glasses, and maybe a dust mask. Protecting your hands and eyes is really important, you know, just in case.
- Metal Cutting Tools (Optional): If you plan to add legs or modify the drum, you might need a grinder with a cutting wheel or a reciprocating saw with a metal blade. This is only if you're getting a bit more advanced, you know.
- Drill and Metal Drill Bits: For attaching legs or creating drainage holes if needed.
- High-Heat Paint (Optional): If you want to paint the outside of your fire pit for a finished look, make sure it’s rated for very high temperatures.
- Legs/Stand Materials (Optional): Metal pipes, rebar, or angle iron if you're building a custom stand. You could also use concrete blocks or bricks for a simpler base, which is often easier.
- Cleaning Supplies: Stiff brush, soap, water, and maybe a wire brush.
- Fire Pit Accessories: A poker, a spark screen, and a cover for when it's not in use. These are for after the build, of course, but good to think about.
Step-by-Step: Building Your Dryer Drum Fire Pit
Now for the fun part: putting it all together! The basic idea is simple, but there are a few ways to approach it depending on how fancy you want your fire pit to be. The main goal is to have a stable, safe container for your fire. This is where your efforts from cleaning and gathering materials really pay off, you know, just seeing it come together.
The Basic Setup
The simplest way to use a dryer drum as a fire pit is to place it directly on the ground. However, you need to make sure the ground is safe. A gravel or dirt patch is ideal. Avoid placing it directly on grass, wood decks, or any other flammable surface. You can also place it on a few concrete pavers or bricks to lift it slightly off the ground, which is actually quite helpful for airflow and protecting the surface underneath. This basic setup is, in some respects, the quickest way to get a fire going.
Make sure the drum is stable and won't tip over. If it has a slightly rounded bottom, you might need to use a few rocks or bricks to wedge it in place. The holes in the drum are perfect for airflow, so you don't usually need to drill more, but if you notice the fire struggling, a few extra small holes near the bottom could help, you know, just to get more air in.
Adding Legs for Stability and Airflow
Adding legs to your dryer drum fire pit is a pretty popular option, and for good reason. It lifts the drum off the ground, which improves airflow even more and helps protect the surface underneath from direct heat. It also makes the fire pit a bit more comfortable to gather around, you know, just a bit higher up. There are a few ways to attach legs, basically.
One common method is to use metal pipes or rebar. You can weld them directly to the bottom of the drum if you have welding experience and equipment. If not, you can drill holes through the side of the drum near the bottom and bolt the legs on. Make sure the bolts are heat-resistant, which is very important. You'll want at least three legs for stability, but four is often better, just for that extra bit of balance.
Another approach is to create a separate stand for the drum. This could be made from angle iron, creating a sturdy frame that the drum simply sits inside. This method doesn't require drilling into the drum itself and can be a good option if you want to keep the drum pristine. Whatever method you choose, ensure the legs are securely attached and can support the weight of the drum and the fire, which is, you know, quite a load.
Safety First: Important Considerations
No matter how you build your dryer drum fire pit, safety has to be your number one priority. Fire is wonderful, but it demands respect. Taking the right precautions will help ensure that your backyard gatherings are memorable for all the right reasons, and not, you know, for something going wrong. This part is, arguably, the most important section of all.
Placement and Surroundings
Always place your fire pit on a non-flammable surface. A concrete patio, a gravel area, or bare dirt are good choices. Keep it a safe distance away from your house, fences, trees, shrubs, and any other structures or flammable materials. A general rule of thumb is at least 10-15 feet, which is pretty generous. Be mindful of overhead branches, too, as a matter of fact, as sparks can fly upwards.
Have a water source nearby, like a garden hose or a bucket of sand or water, just in case. This is your immediate backup for any unexpected flare-ups. Never leave a fire unattended, even for a moment. And always make sure the fire is completely out and cold before you leave it or go inside. This means no glowing embers, which is quite crucial.
Materials and Ventilation
Only burn seasoned wood in your fire pit. Green wood, treated wood, or trash can produce a lot of smoke, harmful chemicals, and sparks. Stick to natural, dry wood. The ventilation holes in the dryer drum are excellent, but ensure they aren't blocked by ash or debris during use. Good airflow means a cleaner, more controlled burn, you know, which is always better.
Be aware of wind conditions. A strong breeze can easily carry sparks and embers, creating a fire hazard. If it’s too windy, it’s simply better to wait for another day to enjoy your fire pit. Also, consider getting a spark screen to place over the top of the drum. This helps contain sparks and embers, adding an extra layer of protection, which is a good idea for peace of mind, basically.
It's also worth noting that the metal of the drum will get extremely hot. Warn everyone, especially children and pets, to keep a safe distance. Have a long poker or tongs to manage the fire, so you don't have to get too close. These simple steps, you know, make a big difference in keeping everyone safe and sound.
Making It Your Own: Personalizing Your Fire Pit
Once your dryer drum fire pit is built and safe, you might want to add some personal touches to make it truly yours. This is where your creativity can really shine. You can make it blend in with your backyard decor or stand out as a unique piece, which is pretty fun, you know, to add your own flair.
One popular option is to paint the outside of the drum with high-heat resistant paint. This kind of paint is specifically made for surfaces that get very hot, like BBQ grills or engine parts. You can choose a classic black, a rustic bronze, or even a vibrant color if that suits your style. Just make sure the paint is fully cured before you light your first fire, which is important for the paint to last, basically.
You could also build a decorative surround for your fire pit. This could be a circle of bricks, stones, or even a metal ring. This not only adds to the look but also provides an extra barrier, keeping people at a safe distance from the hot drum. Some people even incorporate a small seating area around it, using benches or comfortable chairs, which is quite inviting, you know, for gatherings.
Think about adding some decorative elements around the base, too. Perhaps some river rocks, or even some interesting garden sculptures. The idea is to make it a focal point in your outdoor space, a place where people naturally want to gather. It’s a chance to express your style, you know, and make it feel truly special.
Enjoying Your New Fire Pit: Best Practices
Now that your dryer drum fire pit is ready, it's time to enjoy it! Knowing how to use it effectively will make your fires more enjoyable and help your fire pit last longer. There are a few simple tips that can make a big difference, you know, in the overall experience.
When starting your fire, begin with smaller pieces of kindling and gradually add larger logs. This helps the fire get established and reduces smoke. Don't overload the drum; keep the fire to a manageable size. You want the flames to stay well within the drum, not leaping out, which is pretty important for safety, basically.
Use dry, seasoned hardwood for the best burn. Woods like oak, maple, or cherry burn hotter and longer, and produce less smoke than softer woods like pine. Avoid burning anything that has been chemically treated or painted, as this can release harmful fumes. And never use accelerants like gasoline or lighter fluid; they are incredibly dangerous, you know, just too risky.
As the fire burns down, use a poker to move the logs around and ensure they burn evenly. This helps get the most out of your wood. When you’re done, let the fire burn down naturally, or carefully douse it with water or sand. Make sure all embers are cold before leaving the area, which is, you know, the final safety check.
Keeping It Going: Maintenance and Care
Taking a little bit of time to care for your dryer drum fire pit will help it last for many seasons of enjoyment. Like any outdoor item, it will be exposed to the elements, so a little upkeep goes a long way. This is, in some respects, about protecting your investment in fun times, basically.
After each use, once the fire pit is completely cool, clear out the ash and debris. A small shovel and a metal bucket work well for this. Ash can hold moisture, which can lead to rust over time, so getting it out is a good idea. You can often use the cooled ash in your garden, too, as it can be a good soil amendment, which is pretty neat for recycling.
If your fire pit is exposed to rain or snow, consider getting a cover for it. A waterproof cover will protect the metal from rust and keep leaves and other debris out. If you don't have a cover, try to store it in a sheltered spot, like under an awning or in a shed, especially during the off-season. This will significantly extend its life, you know, just by keeping it dry.
Periodically check the drum and any legs for signs of rust or weakening. If you notice any rust, you can often wire-brush it off and apply a fresh coat of high-heat paint. Addressing small issues early can prevent them from becoming bigger problems, which is, you know, just good practice for anything you own.
The Bigger Picture: Repurposing and Our Planet
Creating a dryer drum fire pit is more than just a cool DIY project; it's also a small but meaningful way to contribute to a healthier planet. Every item we repurpose means one less thing in a landfill and one less new item that needs to be manufactured, which uses up resources and energy. It's a really simple concept, but it has a powerful impact, you know, when many people do it.
Think about all the old appliances that get tossed out every day. Washers and dryers are some of the most essential appliances in your home, and when they reach the end of their life cycle, they often just become scrap. By giving a dryer drum a second life as a fire pit, you're participating in a cycle of reuse that benefits everyone. It’s a tangible example of creativity meeting environmental responsibility, which is something to feel pretty good about, basically.
This kind of project also encourages a mindset of looking at things differently. It teaches us to see potential where others might only see junk. And that, in itself, is a valuable lesson. So, as you gather around your cozy, repurposed fire pit, you can feel good knowing you've made something awesome and done a little bit of good for the world, too, which is quite a nice feeling, really.
Frequently Asked Questions About Dryer Drum Fire Pits
People often have questions when they're thinking about making a dryer drum fire pit. Here are some common ones that come up, you know, just to help clear things up.
Is a dryer drum safe for a fire pit?
Yes, a dryer drum can be safe for a fire pit, provided you prepare it properly and follow all safety guidelines. The key is to remove all non-metal components, like plastic and rubber, as these can release harmful fumes when burned. The metal itself is designed to withstand heat, which is pretty good for this purpose. Always ensure good airflow and place it on a non-flammable surface, which is very important.
What do I need to make a dryer drum fire pit?
You'll need the dryer drum itself, of course. Beyond that, basic hand tools like screwdrivers and pliers for disassembly, safety gear (gloves, glasses), and potentially some metal cutting or drilling tools if you plan to add legs or make modifications. High-heat paint is


Detail Author:
- Name : Arvilla Stark
- Username : barrett77
- Email : maggio.rhea@pacocha.com
- Birthdate : 1991-02-25
- Address : 17961 Major Circles Fisherbury, NJ 13709
- Phone : (412) 370-9775
- Company : Roob-Rosenbaum
- Job : Battery Repairer
- Bio : Qui culpa nulla fugiat molestiae molestias. Nesciunt consequatur possimus in ad tenetur. Ipsa et error impedit inventore quia veritatis similique aliquid.
Socials
facebook:
- url : https://facebook.com/urban_mosciski
- username : urban_mosciski
- bio : Officia facere necessitatibus id est dolorum harum.
- followers : 3840
- following : 616
linkedin:
- url : https://linkedin.com/in/urban_mosciski
- username : urban_mosciski
- bio : Molestiae aut vitae aut.
- followers : 6497
- following : 1644
twitter:
- url : https://twitter.com/mosciskiu
- username : mosciskiu
- bio : Fugit minus et debitis consequuntur. Ut nobis tenetur tempora iusto. Quia voluptas beatae vel nostrum.
- followers : 5726
- following : 629
tiktok:
- url : https://tiktok.com/@mosciski1992
- username : mosciski1992
- bio : Velit velit qui sed. Culpa laboriosam fugiat quo animi.
- followers : 4920
- following : 1306
instagram:
- url : https://instagram.com/urbanmosciski
- username : urbanmosciski
- bio : Natus sequi in voluptas minus. Voluptatem architecto accusantium alias.
- followers : 2502
- following : 1638
